Phoenix Grill Maintenance
Maintaining your Phoenix Grill

Phoenix Grills have been built to last and provide years of worry-free grilling. However, like everything, they do require a little maintenance to keep them performing at their best.
Clean the inside of your grill
Although you should not have to spend a lot of time cleaning your Phoenix Grill, it is important for proper heating and safety to keep the inside of your grill clean.
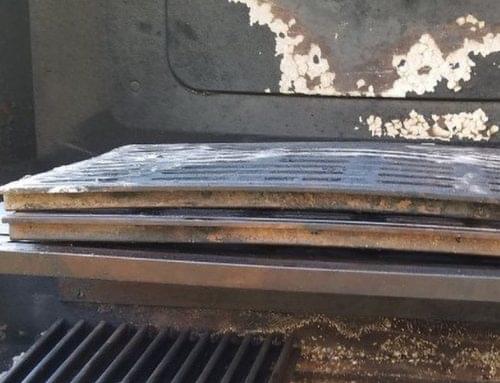
Cleanup of your Phoenix Grill is very simple…but also very important. As you cook on your grill, you’ll notice that “black crunchy stuff” will build up on the drip pan. To ensure proper heating it is important to regularly clean the following three things inside your grill:
- The cooking grid
- The drip pan
- The drain pipe
NOTE: The grill will be easier to clean when it is warm. A good time to clean the grill is right after grilling and food has been removed from the grill. Since the grid will be warm we recommend using a small hand towel or pot holder to grasp the cooking grid while cleaning it.
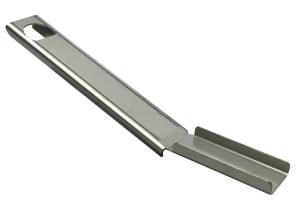
SDDPS | Stainless Steel Scraper Tool for cleaning your Phoenix Grill
Clean the cooking grid
With a 3-inch putty knife scrape the cooking surface side-to-side, letting all the build-up fall through the holes down into the drip pan. Use a steel brush on the cooking surface to remove build-up that is trapped in the diamond-shaped holes. Grab one of the handles of the cooking grid and lift up on it so you can scrape the underside of the grid as well, again letting all the build-up/residue fall down into the drip pan. Remove the cooking grid from the grill and set it aside.
Clean the drip pan
With the cooking grid removed, we recommend using our Stainless Steel Scraper (SDDPS) that has been designed specifically for cleaning our Phoenix grills or a 3-inch putty knife to scrape the build-up from the surface of the drip pan. Scrape it down towards the drain channel, until all the debris is accumulated in the channel. You don’t have to scrape the drip pan down to its shiny surface. Just scape enough to clear the build-up. Using the Stainless Steel Scraper (SDDPS) or a 1-1/2″ putty knife, scrape out the drain channel and scoop out the black crunchy stuff, putting it in your bucket. It is important to keep the drain channel clear to give you maximum heating performance.
Clean the drain pipe
Finally, you will need to occasionally clear the drain pipe to make sure the drippings can run freely out into your drain bucket. If you notice grease accumulating in the drip pan but it is not running into the grease bucket either your drain valve is not open or the drip pan pipe is clogged. Don’t attempt to clear the clog while the grill is hot! Once the grill is cooled, we recommend removing the cooking grid and running a rod down through the pipe drain to clear out any build-up.
After you finish these three easy tasks, use paper towels to wipe off any excess grease from the edges of the grill. Replace the cooking grid and you’re ready to go.
Clean out the burner
Sometime during the life of your grill, you may find it necessary to clean out the burner. Although it takes moderate effort, it’s not difficult.
After a period of time, the burner may become obstructed with a rusty powder, cobwebs, etc. that can disrupt the proper air/gas mixture. With a little effort, you can remove these obstructions and keep your grill operating properly.
It is not uncommon for residue to build up in the burner of your grill over a period of time. This residue can be a rusty powder as well as wafer-thin flakes. It’s a combination of rust and soot and easily removed. Too much of this build-up will not allow the air and gas to mix properly and will affect the performance of the grill. Some signs that it’s time to clean out the burner are:
- Grayish or black “sooty” appearance to the food
- A “lazy” mostly yellow flame
- Poor heating performance (in combination with above)
If you experience any of these symptoms, you will have to inspect and if necessary, clean out the burner.
CAUTION: Turn off and disconnect any gas supply before working on your grill. Observe all safety precautions when working with gas. Refer to your owner’s manual for more information.
- Wire brush entire outer surface of burner to remove loose corrosion.
- Clean any clogged holes with a stiff wire (for example, an open paper clip)
- Inspect the burner and venturis for any openings caused by corrosion
- If openings due to corrosion are found, order a new burner (OBSPH34)
- Check the burner for proper location after replacing
- Check to assure the valve outlets are inside of the venturis
- Make sure the wing nuts that hold the burner are tight. Periodically check and tighten wing nuts as needed.
After you’ve cleaned out the loose debris, use a wide putty knife to scrape out any built-up grease. After years of use, splattering grease can build-up in the bottom of the shell, making a flare-up possible if it is not cleaned out.
Need to replace your burner?
We have created step-by-step instructions (with pictures) to help you swap out the burner and get you back to grilling in no time.
Check for Bugs & Spiders
In some areas of the country, spiders and other insects build nests, lay eggs and spin webs behind the controls, inside the burner or in the grill’s venturi tube or valve orifice. This obstructs the full flow of gas to the burner and can cause some gas to back up resulting in a “Flashback” (a fire in the venturi behind the control panel which could cause serious bodily injury or damage to your grill). While the best way to keep your grill insect-free is by using it, there are also simple maintenance steps you can take to keep your grill clear of bugs and spiders.
Places to look are inside the control knobs and inside the burner. You may have to remove the gas valve and see if something is blocking the orifice. To gain access, first, unscrew the drain valve from the drain pipe (If it’s too tight, use a plumber’s wrench). Remove the cooking grid and lift the drip pan up and out and set them aside.
Follow the steps below to clear your venturis.
Quick Everyday Grilling Tips for your Phoenix Gas Grill
![]() Warning: Always light your grill with the lid open
Warning: Always light your grill with the lid open
For best results we recommend that all preheating, grilling, smoking, baking, and steaming be performed with the lid closed!
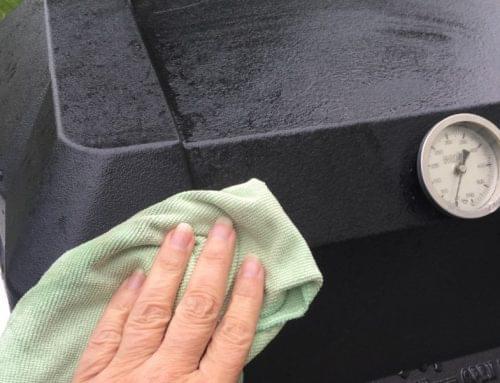
We recommend cleaning the cooking surface (cooking grid) before each use and before you light the grill. Simply run a wire brush front to back and side to side across the diamond-shaped grilling surface. This can be performed with cooking grid in place or you can remove the cooking grid for cleaning.
The drip pan drain valve should be kept open while your grill is in use. This allows the grease that drips from your food to continuously drain into the grease catch bucket. The only time the drip pan drain valve should be closed during grill use is when you are steaming or smoking with liquid smoke.
Cleaning the Venturis
 To remove spider webs and/or other obstructions, you must clean out the venturis. This should be done routinely if the grill has sat idle for extended periods. Also, if you live in an area where spiders are plentiful, you should clean the venturis often, especially in the fall when there is an increase in egg sac production.
To clean, be sure the grill is cold. Open the lid and remove the cooking grid and the drip pan.
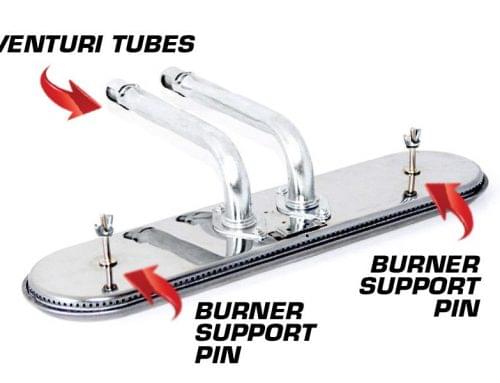
 Remove the burner wing nuts holding the burner in place.
- Lift burner and venturi assembly out. With supplied cleaning brush, a pipe cleaner or a flexible wire, clean out the venturi tube.
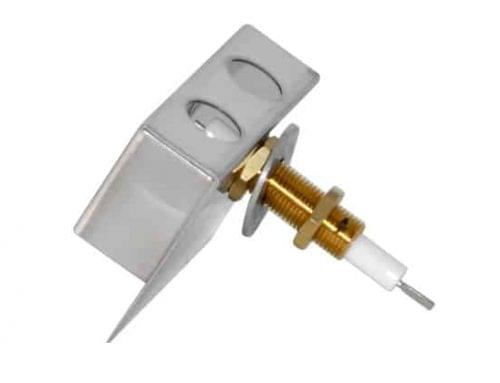
- Remove hex head orifice with a 3/8″ wrench. Clean Orifice hole and inner part of the valve with a toothpick. Be careful not to enlarge the orifice hole.
- Check orifice receptacle in the valve body.
When finished cleaning reassemble the complete unit.
Get your grill leveled
When placing your grill on your deck, make sure to level it from side-to-side and front-to-back to ensure maximum heating performance.
Most decks are sloped for rain run-off. When you decide where you want to place your PhoenixGrill, take a few minutes to make sure it is sitting level. With the lid closed, place a small level on the top of the grill. Check it from side-to-side and again from front-to-back. If necessary, place a small shim under the legs or wheels to bring the grill into a level position. Taking just a few minutes to perform this important procedure will help your grill heat more evenly.